A Day In The A Blue Mountains.

Thanks for visiting my blog. I welcome you to take your time and browse , visiting my bush garden and discovering the wonders of my city within a national park; Blue Mountains National Park. Via my blog you will travel with me through the successes, trials and tribulations of gardening on a bush block. I share with you my patchwork & quilting, knitting, paper crafts, cooking and life in general.
Showing posts with label Art. Show all posts

Monday, 21 January 2013

Rock Art With Miss Five


Today's activity with Miss five called for some improvisation.

I wanted to do some rock art but I couldn't find my stash of garden rocks which I know I have hidden away in a safe place, so safe that I can't remember where it might be.

So, my improvisation lead me to using some dominoes that I had stained with tea a few years ago for using to make a mini domino book.

These were left over.
They are not plastic but a very hard almost stone like material.

The dominoes were laid out on a baking sheet and placed in an oven set at about 150 oC until quite warm.

On the ready were an old towel and a bunch of crayons.


Put the two together...


When the dominoes had run out we had to try the real thing and I found this piece of sandstone in the garden.


There is something enthralling about melting crayons on hot rocks.


Afterwards we awarded the ponies(who had behaved beautifully while we worked) with ribbons and a prize gold cup.


Wednesday, 9 January 2013

Holiday Play With Miss Five #2

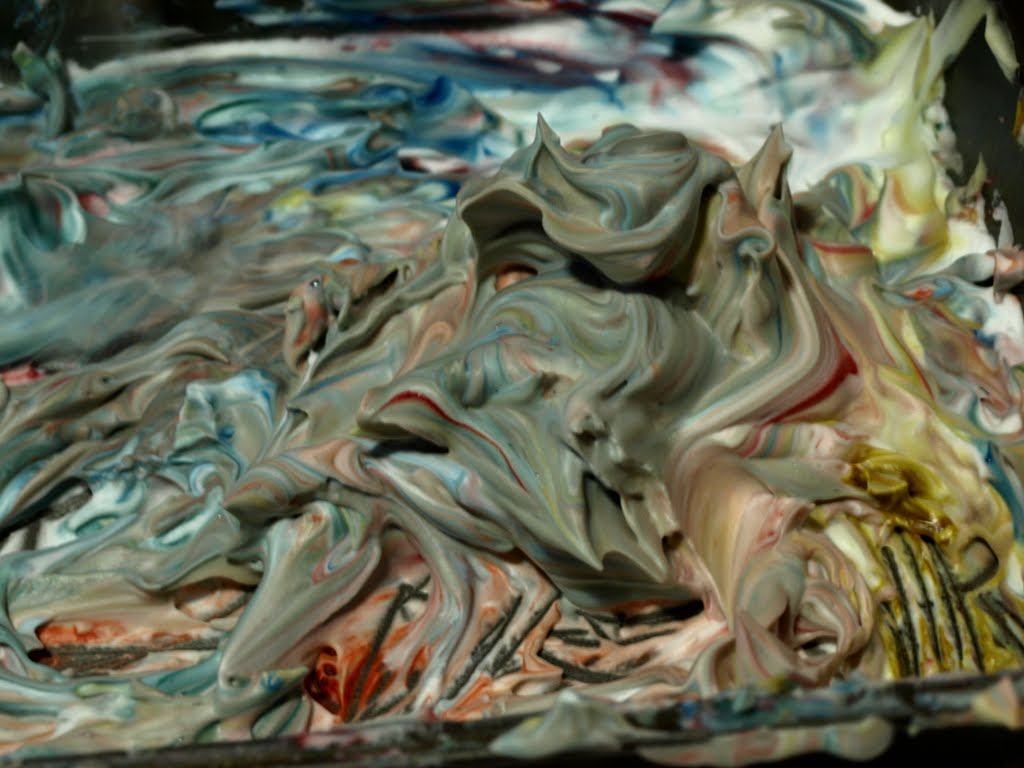
How to make a burst of joy (or how to marble paper)

Monday was another day spent with my Grand Daughter while her Mum was at work.  We were expecting visitors after lunch so that left us with a few hours to occupy ourselves so we got together a few craft items and here is what we achieved.

Take a can of shaving foam (a cheaper generic brand is fine, we used a can that was no longer wanted) and fill the base of a container with the foam. We used an old baking tray but don't use metal if you want to reuse...the foam will turn it rusty.  In fact don't use a container that you will reused for food because the fragrance from the shaving foam will penetrate your container.
Drip drops of stamp pad re-inkers (we used Adirondack pigment ink re-inkers colours: Bottle, Cranberry, Rust, Butterscotch and Denim) on top of foam and with a wooden skewer make swirls.  Do not over mix.


Lay appropriately sized cartridge or copy paper over top of foam until well coated (you will see colour bleed through to back of the paper).


Remove and allow to set for about thirty seconds. Using a plastic spatula scrap away excess foam and return the excess to tray.
Allow to dry completely.


After about fifteen to twenty minutes Miss Five was convinced that she had created enough "Bursts of Joy" (her terminology) and what she really wanted to do now was stir the 'splodge' until it turns 'brown'. (A most favourite activity for Miss Five as long as she has had the ability to 'paint'.)


To dispose of foam, scrap onto sheets of newspaper wrap and place in bin.
If your little Miss or Master can be convinced to skip the 'mix to a brown' stage the foam will keep for some hours and I'm sure has the ability to create numerous sheets of beautifully marbled paper.
Our marbled sheets will be kept for paper craft activities next time Miss Five spends the day with me.


Wednesday, 15 August 2012

Day 228/366


Sand Art at one of my most favourite places in Australia - Byron Bay.
The weather has been miraculous, and we have walked until we could walk no more.
Tomorrow we head south with reports of snow above nine hundred metres.

Wednesday, 24 August 2011

All Before Breakfast - Art for Art's Sake.

For my little brother's birthday I'm decorating the front cover of an art journal.  It's A5 size so that it's easily carried about. 


This one I picked up at my local art store. Prices range from $2.95 upwards.
From the Graphics Fairy, I made a collage using this Vintage Ornate Skeleton Key graphic and this Gothic Arch engraving.
While in my photo editing program (I use Picasa) I added the word 'journal' and my brother's initials. I printed this out on the oatmeal coloured A5 card, then trimmed to size.
On the 2nd A5 oatmeal card I printed out various words using different fonts and cut them out, distressed them using the inks before mounting them onto black card cut to size.
Cutting a square into triangles makes a couple of corners to add to the collage.
Next, I cut the white card and the black card to size and rounded the corners on the right side using the punch. 
I added some gold ribbon to the black card which was then mounted onto the white card.
Some tabs were added to one of the word tags and to one side of the collage.
On the black tab the year '2011' is written with white gel pen.
Added the corners distressing with ink as I went.  I finished off the corners with gold split pins. 
More gold ribbon was added to the collage.
All elements were then adhered and layered.
With the journal, I'll include a few pencils and the gift will be complete.

Now, to have breakfast, oh dear, or is that lunch?

I'm linking this post to The Graphics Fairy Brag Monday.  Yes I know...a little late.

The Graphics Fairy


Comments Welcome

I welcome your comments; they are little personal notes to me. I enjoy reading what each of you have to say. Thanks for dropping by.