A Day In The A Blue Mountains.

Thanks for visiting my blog. I welcome you to take your time and browse , visiting my bush garden and discovering the wonders of my city within a national park; Blue Mountains National Park. Via my blog you will travel with me through the successes, trials and tribulations of gardening on a bush block. I share with you my patchwork & quilting, knitting, paper crafts, cooking and life in general.
Showing posts with label Tutorial. Show all posts

Tuesday, 24 July 2012

Day 206/366


The Graphics Fairy Spring Printable inspired these very-easy-to-make fridge magnets.
All you need is a print out of the bugs and butterflies (at the above link) at a size suitable for your glass pebbles, (I used high resolution paper for printing to stop colour bleed); some good, clear-drying glue, scissors, pencil, and one small, round magnet for each pebble.
Using the pencil, trace pebble shape around selected bug/butterfly, cut out paper shape of image and with image facing up, glue shape to back of glass pebble eliminating air bubbles if they occur. Once the glue/paper is dry,  glue magnet to back of pebble, allow to dry completely and that's it.
What could be simpler?


Saturday, 7 July 2012

Day 189/366


I wish I could say I've grown these African violets myself, but I can't: I bought them from the growers' markets in Penrith a month ago.
These little beauties flower well as long as they are provided with lots of (filtered) light and are kept at a temperature above fifteen degrees Celsius.
The only way I can provide such an environment is to have the pots sitting just centimetres from a south-west facing window and to have the heating on.
Today, our lowest temperature was less than one degree.
Our high didn't quite reach fifteen degrees.
I decided (after I'd done my shopping at this month's growers' markets) it was the perfect day to stay indoors and re-pot the African violet cuttings I'd struck over the last couple of months.
These cuttings were taken from this plant.
Here's how I did it:
(I'm not going to give a detailed post on this because there are numerous blogs/videos with great instructions on the WWW already).
Instead, here is a picture-log.


The cuttings were struck in an African violet liquid feed.  Plant-lets have grown from the base of the stem, as have masses of roots.


I prepared discarded take-away food containers (these are from a a sauce that came with our Thai takeaway).
A wick was created from an unwanted nylon shoe lace (don't use cotton or wool).


Cut holes in the lids of rectangular Chinese food containers to house the babies, fill base with African violet liquid food so that wick just sits into the liquid.


Set in a warm and nicely lit position and wait.


Thursday, 8 December 2011

Upcycling - Christmas Cards. #2

No Sew Christmas Bunting.


Start off with a wide-ish Christmas card from last year.  About 12cm wide.

Cut front of card away from back.

Mark centre of card front on the back of bottom end. (The top of illustration should be at the widest end of your piece).

Rule a line from this mark to both top corners.

Cut.


Once again rule a line on smaller pieces from  bottom corner of triangle to centre of cut edge.

Cut along this drawn line and you should now have five pieces as shown above.

Form a 'crown' shape with the longest narrowest strips and use staples to hold together.
There are two of these shapes.
One will be a napkin holder, the other a place card.


Punch circle from backs of cards, write names on circles and staple to upturned 'crown' to form a place card.


Repeat the above until the required amount is achieved.

Use the back of the card for notes, shopping lists, etcetera.

To complete the bunting staple the bunting shaped cards to a strip of ribbon. Alternate between the large and small shapes.
Use whatever ribbon you have on hand that might be suitable.
I used gold ribbon left over from last year's gifts for the above bunting.
For my larger bunting I used some cotton tape that I'd purchased from the op-shop with a whole lot of haberdashery.
If you wish add lots of glitter by outline edges with glitter glue.

I've linked to Artful Affirmations
Visit Terri at Artful Affirmations to see 
what others have been making in preparation for Christmas.

Wednesday, 19 October 2011

Fizzy Fruit Lollies.

It's my BIL's birthday this week.  Normally we only exchange cards but this time I thought I'd surprise him with a card with a twist.  

I know he loves fizzy sweets so I bought this packet for less than two dollars at our local supermarket.
I printed out this graphic of a motor bike from The Graphics Fairy because he is a motorbike freak.
I used A5 size card stock and trimmed the sides to the same width of the label and then added  folds above and below the graphic.

Next it's only a matter of stapling the top fold over the original label to hide (but still accessible) and adding a hand written greeting to the bottom flap.

Fold up the bottom flap and there you have it; a card and gift in one.

Edit-23rd October: Australia Post did a great job of delivering the above gift to BIL so that it arrived in time for his birthday.
He said "it was the best birthday pressy ever".  I guess it helped that he didn't know that we knew that fizzy lollies are his favourite!

Linked to Brag Monday at


Sunday, 5 June 2011

June Birthdays

In June,our family celebrates seven birthdays so I've been busy making not only quilts but birthday cards too.
For my fourteen year old niece I'm taking the Sketch Saturday Week 158 challenge which is being hosted by Jeanette this week.


Instead of making a card, I'm making my niece  a journal which will double as a card.

I picked up an A5 visual art diary for under three dollars from my local art shop.  Also some super strong double sided tape.  I usually use sticker paper (sometimes called Jac Paper) but I haven't been able to source any recently.

Strips of double sided tape is applied to the front cover of the diary.
Then some, what I call 'layering', takes place beginning with a solid colour in this case.
Inspired by daisyquilts.blogspot Colourful Fridays' next theme of "blue and orange together" I have started with: ORANGE.


Next layer is orange themed background paper then dark blue layered with light blue.

Found a 'quirky' paper doll graphic at The Graphics Fairy which I think is perfect; not only for the colours but also because a journal can be a life saver - literally.  
The graphic has been cropped, with text added, layered further, embellished with paper flowers, tasselled ribbon, Bradz and the sentiment 'quirky' (printed out from a Word Doc.), and all adhered to the cover.
Thanks everyone for the inspirations!!
I have linked this post to 
and will link to others as the week progresses.
Also linked to Brag Monday @ The Graphics Fairy.

Have a super week.


Saturday, 4 June 2011

Featured Graphics Fairy DIYer!

Many thanks to Karen, from Graphics Fairy DIY blog, for featuring my CD Clock tutorial on her blog today.  What a lovely and unexpected surprise.
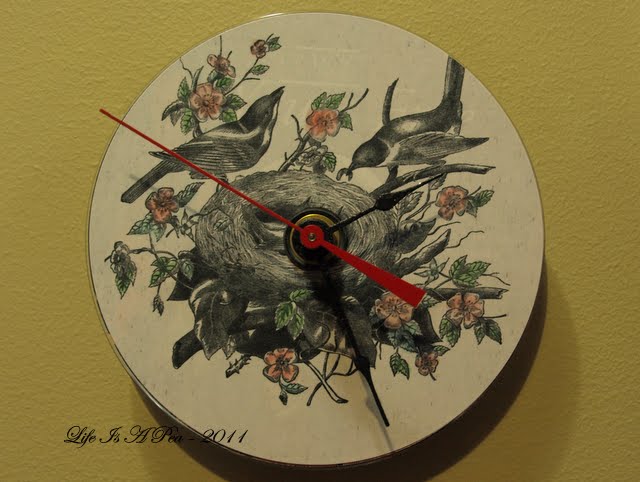
Here is the link to my tutorial.
Hope you will drop over and visit Karen.  She is pure inspiration.
Thanks again Karen!

Thursday, 2 June 2011

Twin Quilts for Twin Sisters.

Yay! Sue Bell from Fancy Stitches has finished continuous quilting my Twin Quilts.  Wow, can't believe she managed to do both in less than one week!  She also machine sewed the binding on for me so all I need to do now is hem the binding and add the labels.
Found this great tutorial for blind stitching quilt binding. Love it!  Thanks to Dream Weaver's Quilts.


I'm loving everything about these two quilts.  As they were progressing I had my doubts about these and that.  When I went to purchase the backing fabric I couldn't find what I wanted, and on and on....
Now that they've all come together I'm very happy.  Hope my sisters are too!!!!
All that's left to do now is hem the binding and sew on the labels. 
Then they're off to a birthday party on the 11th June.
I'm linking this post to WIP Wednesday at Don't Call Me Betsy.  WIP Wednesday is usually hosted at Freshly Pieced.
Hope you all have a great day!

Comments Welcome

I welcome your comments; they are little personal notes to me. I enjoy reading what each of you have to say. Thanks for dropping by.