A Day In The A Blue Mountains.

Thanks for visiting my blog. I welcome you to take your time and browse , visiting my bush garden and discovering the wonders of my city within a national park; Blue Mountains National Park. Via my blog you will travel with me through the successes, trials and tribulations of gardening on a bush block. I share with you my patchwork & quilting, knitting, paper crafts, cooking and life in general.
Showing posts with label Upcycled. Show all posts

Friday, 10 July 2015

Plank Method, As Opposed To Planking*

I discovered basting a quilt using the plank- method last year when I was making a quilt for the latest addition to Mr HP's side of the Family.
 I love how quick and easy it is and I had this whole cloth* quilt basted in no time and with little back breaking antics.
 Never before have I made a whole cloth quilt and only decided that this one would be because the fabric I have used has been rescued from land fill and is heavy weight curtain fabric, one hundred percent cotton or linen and originally from a decore store samples book. 
 The end result is a bold stylish quilt top that is 1.25 x 1.25m, large enough for a lunch cloth, lap quilt or picnic rug.
The weight is such that it's thick enough to use as a picnic rug but lightweight enough to use as a lap quilt in the warmer months.


Since the samples were free of charge, the only cost has been the backing fabric, which I paid $8 a metre for plus some leftovers from another project. The binding will be leftovers from Youngest Son's 21st birthday quilt.

I'm so in love with it, I haven't decided if I should keep it for myself or gift it.

* Seems I have my info. wrong here...this is not a whole cloth quilt but rather a 'summer quilt'.

*Planking, a brief history


Linking to Freshly Pieced ~ pop over to see what Lee and others have been up to in the quilting world in WIP Wednesday. Click on the button below to take you there. 


Wednesday, 8 July 2015

Upcycling: From Sloppy Joe to Genie Pants


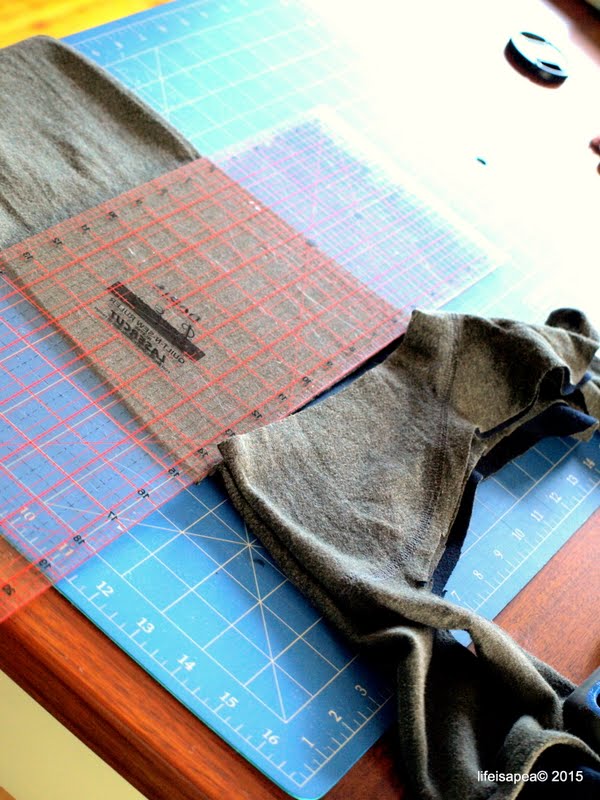
Sometimes you buy stuff that's not really suitable for you, or the person you intended it for...like the cotton knit sloppy Joe (above) which I purchased many years ago for Mr HP.  It's just too big and too sloppy and the hems had - well, no hems, and were just over-locked giving the garment an unfinished look!


So after having had the top floating around in the wardrobe for at least a decade and not wanting to throw it out, I decided it was time to give it new life by re-purposing into a pair of soft genie pants for Little Miss Seven. 
I used the main body of the top to cut out the pants using a girl's pyjama pants pattern. 

From the sleeves I cut cuffs for the pant legs and a band for the waist, using the fabric in reverse.  The knit fabric is grey on one side and navy on the other which works well to give the effect of having used two different coloured fabrics. 
I used another pair of Little Miss' track pants to measure the width of the the bands for the cuffs and waist, allowing extra for the seams.  The height was double the finished piece. I folded them over and stitched straight onto the pants using a stretch stitch on the sewing machine. 

Because the pattern used is for standard cotton fabric and not stretch/knit fabric and no elastic is used in the waist, the pants are nice and lose and my Grand Daughter just loves to lounge around the house in them.  She especially loves the fact that there is no elastic in the waist.


Friday, 19 June 2015

It's Not Easy Being Green

One day last month I ventured into our local Salvos Store to do some browsing.  It's not a store that I can just wander into as do my shop in the village because it's set apart from the main shopping strip.  It's a store I drive past each time I drive into town but I have to make a conscious decision to go there. 
Once inside I found a huge pile of green single bed sheets (among other things of course!).  One hundred percent cotton, brand new, and a heavy cotton at that. At five dollars each I couldn't pass up on buying one and my intention was to use it as a table cloth on our newly refurbished dining room table.
Green is not my favourite colour. 
Especially this particular shade of green.
It is sort of a vintage green, you know, the one from the late fifties and early sixties.
Institution green.  School classroom walls green, public rest room green.
Much of the interior of my childhood home (which we moved into in the very early sixties) was painted green.
Mum used to tell me that the colour green is very good for the eyes.  She never said why.  Today, I avoid the colour green as much as possible, especially THAT shade of green.  I love the colours jade, aqua, turquoise, teal...but not green!
But I thought a green sheet as a table cloth for everyday use might be okay.
So yesterday was the day I decided to work on the green sheet and bespoke it to fit our dining table.
My Mum was a great seamstress and she taught me to sew when I was very young but she had the knack of just being able to put two pieces of fabric together and sewing it to perfection.  I didn't have that knack and found sewing very frustrating. Especially when I had to unpick sewing, which was more often than not.
But then I took up patchwork and quilting. And I discovered pins.
I have a multitude of pin cushions, this one was a Christmas gift from my Grand Daughter in 2013

And I was taught that if I ironed and pinned my hems, binding etc, well, things came together much better!


As I worked on my project (I needed to cut a strip of fabric off one end as the sheet was too long for our table) I came across a label.


It was then I realised that the sheets are ex-defence stores which must have been donated to the Salvos!

Oh well, there was no turning back! 

With the strip of fabric I cut off I made four serviettes.  I'm very big on serviettes as I refuse to buy paper products (except for toilet paper - and tissues when the lurgy is going around).


I'll just have to remember not to use these when I've got defence-forces family visiting!


But for everyday use I don't think it looks too bad.  I do have another table cloth I can alternate with. (We're not really a tablecloth kinda family but the new paint job needs protecting. And oh...the chairs that go with the dining table are awaiting a face lift and reside in the garage as I speak.)


And it kinda looks cute with my dragonfly china.

Being the ultimate re-cycler I had one little scrap of fabric that I couldn't throw out so I made Little Miss Seven a sack for her school lunch box for the days Nanna has to do school lunch.  It's just large enough to hold some ice coolers, or a frozen water bottle, or her frozen yogurt sippy.


I didn't bother with drawstrings or closures because it's only meant to soak up excess moisture in her lunch box.  The less for little fingers to worry about.

And the label, impossible to remove, except with scissors, I decided to keep (it's inside the sack) as it will be great to write her name on.

What weird and wonderful project have you completed from a reused item?


Wednesday, 12 November 2014

Normal


It is Normal for me to have many projects going at one time.

Part of what I like to do is think up new ideas for upcycling items that would normally end up as land fill.

Last year I upcycled some coffee bean bags here.  The bags were used to propagate plants which I'm happy to say were later donated to a volunteer group and they were planted in a sensory garden for people with disabilities.  The garden had been destroyed in last year's devastating bush fires.
This year, I'm trying something new with the bags.  I have a huge supply of the black, silver lined bags. Mr Eggins, our coffee supplier has changed his bags now to a brown paper bag look, but still with the lovely silver lining.  I'm still playing with ideas so may show you some finished products later.  For now, here is my normal state of affairs on what is my desk.


Have a happy day, and thank you for visiting.

Sunday, 16 February 2014

Thank You

Thanks again to Karen at The Graphics Fairy for featuring my clock tutorial once more on her blog.


Recently Karen did a feature on her blog titled  "14 Amazing DIY Wall Decor Ideas" in which my clock was included.
It was a lovely surprise and I feel very privileged to be featured.

You can find the wall clock and thirteen other ideas here.

Karen is an inspirational and generous blogger.
Do stop by and visit her.

I'm sure you will be motivated by her enthusiasm. 

Saturday, 15 February 2014

Upcycle Queen

Here in Australia, we have what we call a bunny rug which is an essential item for newborn babies.  It is a large square of fabric usually made from one hundred percent cotton flannelette and used to swaddle baby.

Little Miss Six of course had many of these as a newborn.  She loved being swaddled and without swaddling would have trouble getting off to sleep. 

Recently, her Mum has made a little bit of pocket money by selling no longer needed items of clothing, toys, etc on an on-line garage sale site that we have here in the Blue Mountains.  But it seems everybody wants new bunny rugs for their babies because these just do not move.  So, I bought them off her and made myself some very long lasting dish cloths with them.

I ironed and folded each square into four using the fold line to then cut it into quarters.


This one originally had rounded corners so I marked the freshly cut corners using a plate of the right size as a guide to match the original corners.  


Next I trimmed them with sharp scissors to match the original corners. I kept the original hemming and simply finished off the newly cut edges by matching them to whatever was on the original rugs.  Those that had overlocked edges I overlocked.


 Those that had turned edges I turned.


In all I made sixteen new dishcloths.


Of course, new dishcloths need a tidy under-the-kitchen-sink-cupboard.  So I gave it a spring clean, even though it's almost autumn.

Wednesday, 20 November 2013

Making Do


Recently, I unpicked a stretch cotton nightie I no longer wore.


I carefully unpicked the seams.

 I kept the hem intact to save me time later, and, using this pattern 

I made our Grand Daughter two new nighties - one lilac and one soft green.

The original soft green nightie had short sleeves but there just wasn't quite enough saved fabric for the sleeves so I had to ad lib a little.


The original lilac nightie was sleeveless and a bit shorter than the soft green so I opted for a mauve cotton print for the sleeves because there just wasn't enough of the original fabric...but I don't seem to have a photo (oops).


Little Miss Six has been wearing them non stop since I made them. 

Because it's a nightie I omitted the elastic from the sleeves and later I added buttons to the front of this nightie just so Little Miss Six knows front from back.
To the front of the lilac nightie I added a little pocket which I'd unpicked from the original.


Comments Welcome

I welcome your comments; they are little personal notes to me. I enjoy reading what each of you have to say. Thanks for dropping by.